Tag: wordpress

  • HOW TO: Add Your Twitter Handle to “ShareThis” Plugin Tweets

    HOW TO: Add Your Twitter Handle to “ShareThis” Plugin Tweets

    ShareThis is a great sharing plugin built for WordPress that allows visitors to share your content through their own social media network with only a couple of easy clicks. The only complaints I’ve gotten from clients who use the plugin are:

    1. The buttons are aligned to the left rather than being centered on the line they occupy
    2. When their visitors share a post via Twitter, it doesn’t mention (@) their Twitter ID
    Fixing these two quirks are pretty simple. If you don’t care about centering them, just skip to the second part and change the code in the ShareThis plugin settings screen.

    Centering the Boxes

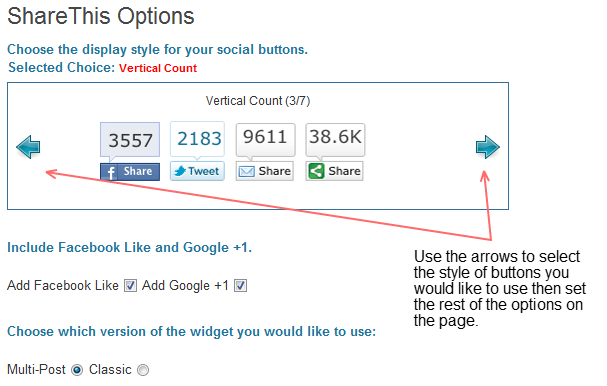
    Rather than trying to modify the plugin code, you simply set your options and extract the code generated by the plugin to display the boxes. (Click on an image below to expand it to full size)
    After following the instructions in the graphic illustrations above, open your theme’s editor (in the WordPress dashboard, go to Appearance –> Editor) then click on Single Post // single.php in the file list in the right side of the page. Find the tag and execute the following either above or below it depending on whether you want the buttons to be displayed above or below your content.

    Paste the ShareThis code you copied from the plugin’s settings screen. Add <div style="text-align: center;"> to the beginning and add </div> to the end of it.

    Adding {@username} to Twitter Shares

    Find the following section in the ShareThis code:

    <span class='st_twitter_vcount' st_title='<?php the_title(); ?>' st_url='<?php the_permalink(); ?>' displayText='share'></span>

    … replace that section with this and be sure to replace YOURusernameHERE with your Twitter ID:

    <span class='st_twitter_vcount' st_title='<?php the_title(); ?> {via @YOURusernameHERE}' st_url='<?php the_permalink(); ?>' displayText='share'></span>

    That’s it. You’ve got centered boxes and your visitors’ tweets sharing your content will mention you, or your brand’s, Twitter name. If you have any questions or complications, leave me a comment below!

    Bonus: Add a share-to-Twitter link anywhere!

    Add the following code to any of your theme files:

    Using a text link:

    <a href="http://twitter.com/home?status=Currently reading @YOURusernameHERE: <?php the_title(); ?> – <?php the_permalink(); ?>" title="Twitter">Share via Twitter!</a>

    Using an image link:

    <a href="http://twitter.com/home?status=Currently reading @YOURusernameHERE: <?php the_title(); ?> – <?php the_permalink(); ?>" title="Twitter"><img src="IMAGE SOURCE URL HERE"></a>

  • Rachel Ferruci: Blog Re-Design

    Rachel Ferruci: Blog Re-Design

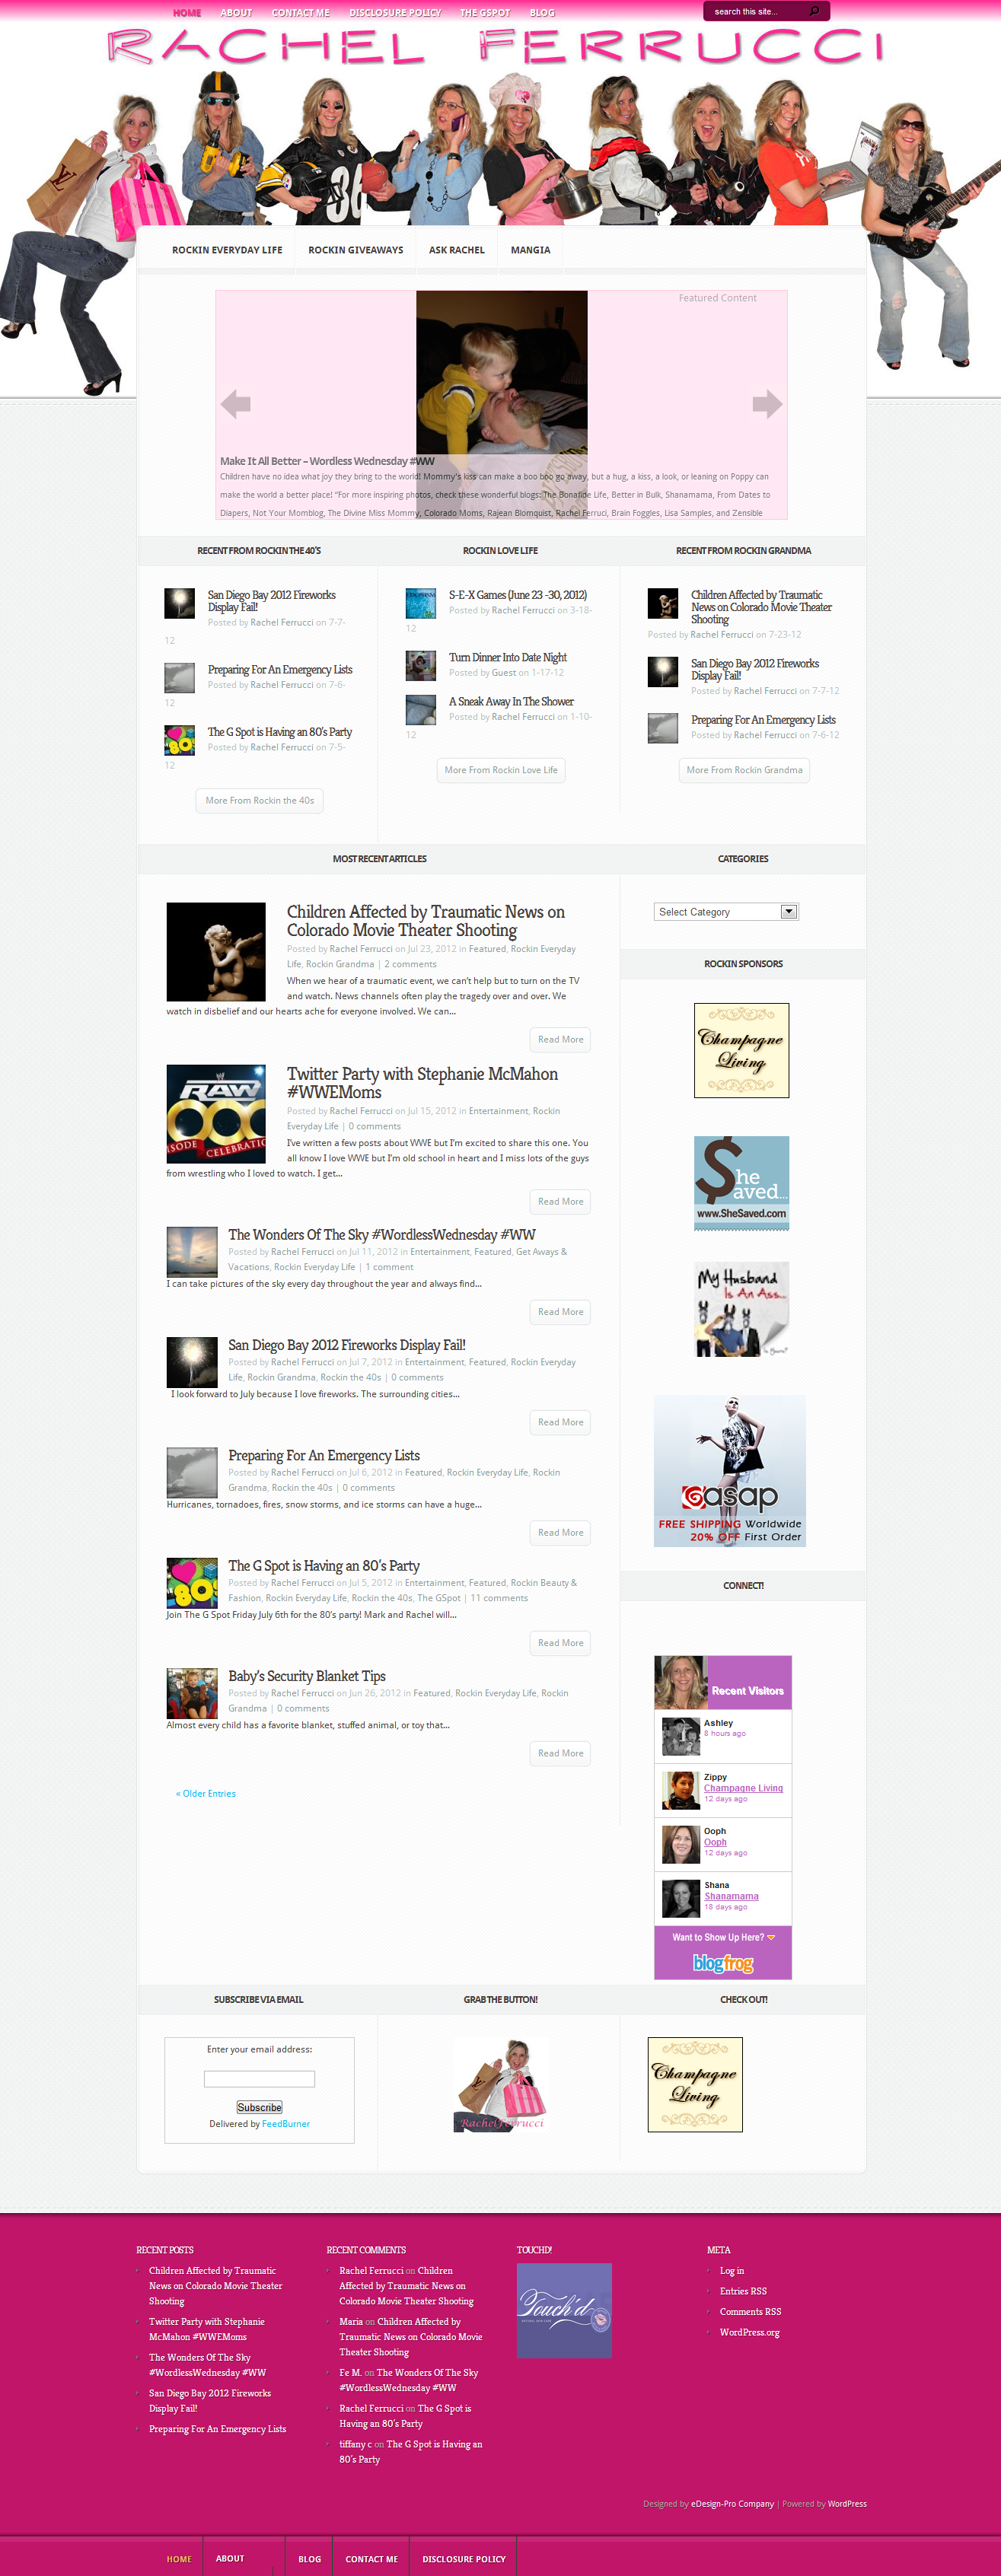
    Rachel is a very dear blogger friend of mine! We began working together a few months ago when she was having issues with her current host. I moved her business website over to my servers and once that was resolved, she decided to hire me to redesign both her professonal website AND her personal blog! We have not yet gotten to her business site, but we did finalize her personal blog redesign. She was in love with the collage of images featuring herself in the many different roles that she occupies in life so we used that graphic in the new design and came up with this:

  • Roo Ciambriello: Bio Design

    Roo Ciambriello: Bio Design

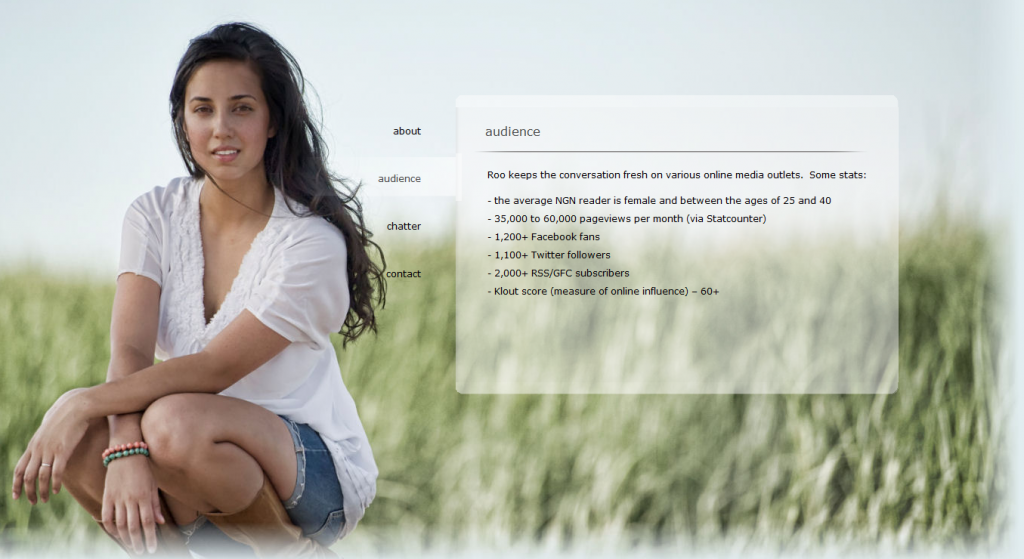
    Roo came to me for a simple personal, yet professional, biography site that utilized one page to display her information for visitors to quickly navigate through details about her as well as how to contact her and connect with her through social media. Anyone interested in finding out more about her now has all of her statistics in an easy to access format contained in an open, attractive, and simple yet elegant design:

  • Twitter Tools Connection Failure? Try Hootsuite!

    Twitter Tools Connection Failure? Try Hootsuite!

    I’ve seen a lot of bloggers with the Twitter Tools dilemma since Twitter changed their authorization method for third party connections. Now, your password can’t be stored in a third party application – it has to go through OAuth which has cause a lot of disarray in the blogging world for those who typically were dependent on Twitter Tools to display their tweets in their blog sidebars and publish their blog post links to their Twitter streams automatically, complete with hashtags, mentions, and even bit.ly URL shortening. OAuth is actually a wonderfully fabulous thing. There are a ton of benefits, the most important of which is that it is definitely a lot more secure.

    While developers get the kinks worked out of their software, we’re just going to have to do some working around the issues we’re seeing on our end. I’m not terribly disappointed about not being able to feed my tweets into my sidebar, but if you are, try the Twitter Widget Pro WordPress plugin and you’ll be back in business in no time :) For blog post link feeding into your social media networks, use Hootsuite. You set up an RSS feed that will feed your blog posts into your tweet stream. You don’t have the option of hashtagging… and your URL will now either be a ht.ly or ow.ly link rather than bit.ly but I’m sure it’s better than manually posting your links, right?

    It’s easy – and to make it even easier, here’s a visual aid:

    If you don’t already have an account, visit www.Hootsuite.com and sign up. Set up your social media accounts and you’re good to go.

    Click the little owl’s head in the top left hand corner to bring down your user control panel menu – go to settings, then click on RSS/Atom:

    Once you’re there, click on the Add New Feed button, complete the form with your feed information and preferences, select the accounts you want to publish to, and then save. That’s it. Your blog feed will now publish into the social media accounts you chose.

    I’ll update when I’ve found a solution to the Twitter Tools issue because I certainly enjoyed the features it offers, such as archiving tweets and of course hashtagging.

  • HOW TO: Fix the Custom File Editor’s Fatal Call Error in Thesis Theme on WordPress 3.0

    HOW TO: Fix the Custom File Editor’s Fatal Call Error in Thesis Theme on WordPress 3.0

    If you have upgraded to WordPress 3.0 and use the Thesis theme, you may have noticed that now you receive a fatal call error when trying to access your custom.css file via the Custom File Editor within your Thesis options that looks something like this:

    Fatal error: Call to undefined function use_codepress() in /DIRECTORY/public_html/wp-content/themes/thesis_17/lib/admin/admin.php on line 42

    In order to correct this, you’ll need to disable the syntax highlighter, which is what is creating the issue. Doing this is simple.

    • Find your admin.php file located in /wp-content/themes/thesis_17/lib/admin/ (you’ll need to download an FTP client if you don’t already have one — my favorite is FileZilla)
    • Open your Notepad or other text/html editor (do not do this in Word or any other program that uses an autoformatting feature)
    • Hold down your CTRL key and press the “F” key. This should pop up a find function. Paste the following string into the box and search for it in your file:

    if (use_codepress()) add_action('admin_print_footer_scripts', 'codepress_footer_js');

    • Comment that line out of the file by placing “//” in front of it like this:

    // if (use_codepress()) add_action('admin_print_footer_scripts', 'codepress_footer_js');

    • Reupload your file using the FTP client

    VOILA! You’re done. Reload your Custom File Editor and it should work like a charm. Of course, the syntax highlighter is now disabled, but at least you can access your custom.css file from within your WordPress dashboard! :) Happy blogging to ya!